This sample shows how to read information from an Azure SQL Database and send them to OneDrive folder using a simple Logic Apps.
I will use a polling statement in order to intercept new data available on SQL Database, transform to a new information schema and then write a XML formatted file in an OneDrive folder.
Following I will demonstrate how to setup the sample environment, how to configure the connection to Azure SQL Database and then how to create the integration flow using Azure Logic Apps.
Setup Environment
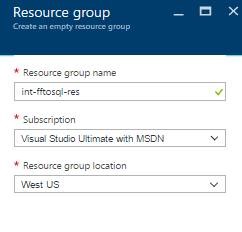
First of all, you need to create a resource group that will contains the SQL Database instance and all the other items needed for Logic Apps.
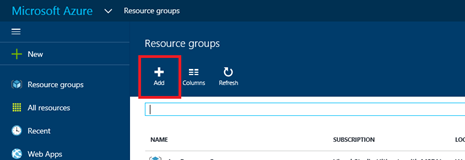
To create a resource group, navigate the new azure portal, click on Resource groups and click on Add.
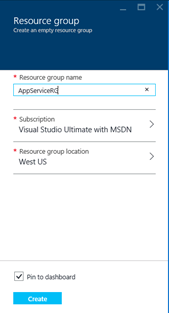
Specify a Resource group name and then click on Create.
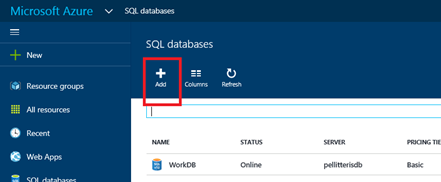
Now you are able to create a SQL Database instance. To do that select SQL Databases from the portal and select Add.
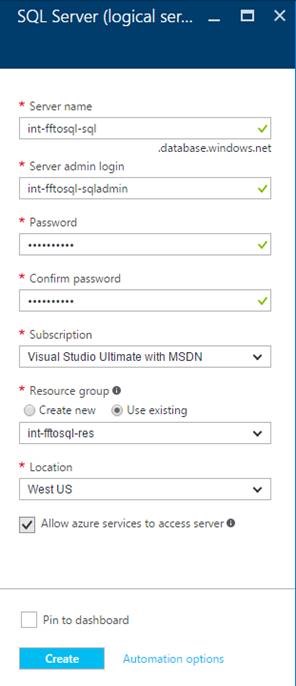
You can choose to add the database to an existing server or create a new server. In this demonstration, I have created a new server.
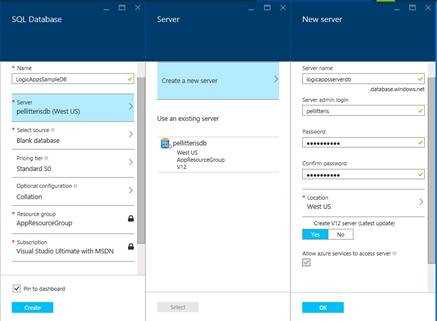
Once you have specified the server name, the user name and password you will use to connect to the database, the resource group previously created and the database name click on the create button to complete the operation.
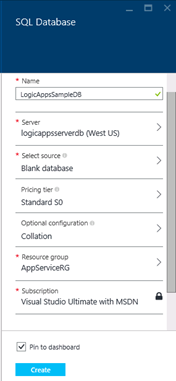
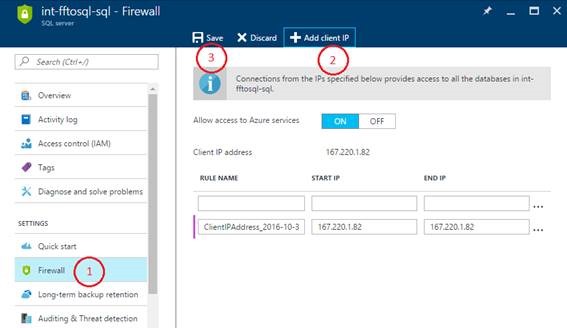
Now you need to open the Azure firewall in order to connect to the database using Microsoft SQL Server Management Studio. So click on server name link.
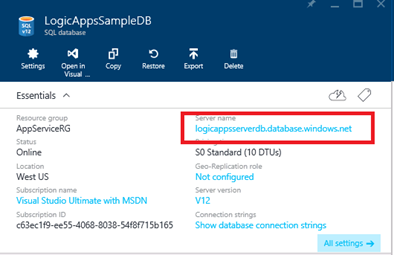
Then click on Show firewall settings link.
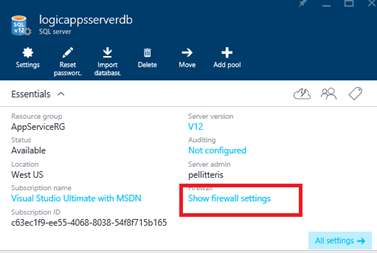
The interface will show you the current IP address of your machine. So click on Ass client IP.
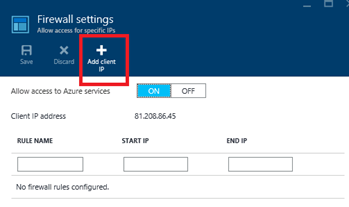
Save the setting.
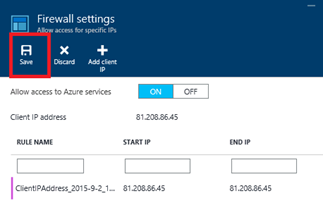
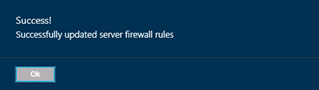
After a few seconds, the firewall will be updated.
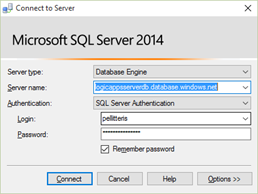
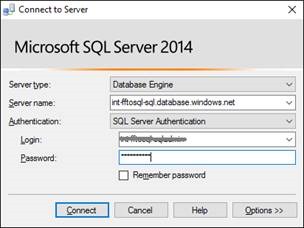
Now you are ready to connect to the SQL database instance. Open SQL Server Management Studio console and connect to the database using the SQL Server Authentication. Provide the credential you have chosen in the previous step.
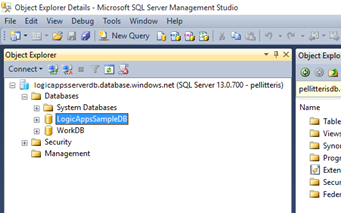
Now you are connected to the Azure database.
Now, we have to create the table that contains the information that the Logic Apps will intercepts and will sent to OneDrive.
Click on new query and run the following statement.
— Source Table
CREATE
TABLE [dbo].[SourceTable]
(
[sourceTableId] [int] NOT
NULL,
[transactionStatus] [varchar](10)
NOT
NULL,
[transactionId] [uniqueidentifier] NULL,
[sampleContent] [varchar](100)
NOT
NULL,
CONSTRAINT [PK_SourceTable] PRIMARY
KEY
CLUSTERED
(
[sourceTableId] ASC
)
)
GO
— Available Statement
CREATE
PROCEDURE [dbo].[AvailableStmt]
AS
BEGIN
SELECT
COUNT(*)
FROM
SourceTable
WHERE
transactionStatus =
‘To Process’;
END
GO
— Polling Statement
CREATE
PROCEDURE [dbo].[PollingStmt]
AS
BEGIN
DECLARE @transactionId UNIQUEIDENTIFIER
=
NEWID();
UPDATE SourceTable
SET
transactionStatus =
‘Processed’,
transactionId = @transactionId
WHERE
transactionStatus =
‘To Process’;
SELECT
sourceTableId,
sampleContent
FROM
SourceTable WITH (NOLOCK)
WHERE
transactionId = @transactionId;
END
GO
|
Create the Microsoft SQL Connector
Once you have created all you need on SQL Server, you can define the database connection. From the portal home page click on Marketplace.
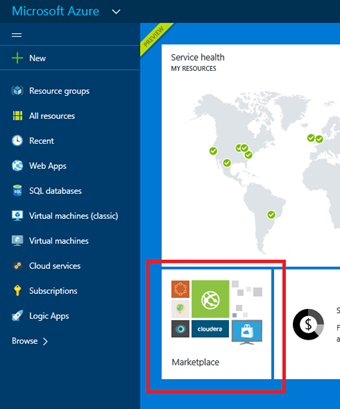
Find for Microsoft SQL Connector.
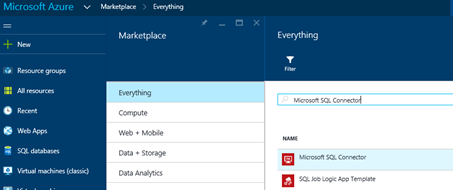
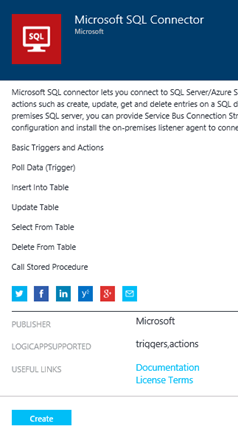
Select the connector and click on Create.
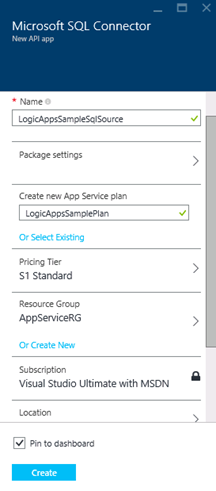
Specify a Name, a Logic App Plan (or create a new one) a resource group and then click on Create.
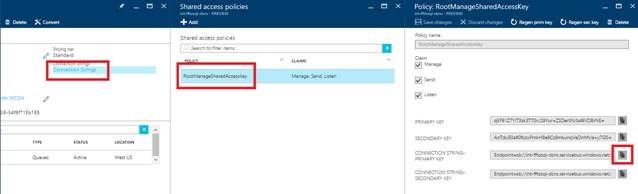
Now you have to specify the server name, the user name and password, the database name.
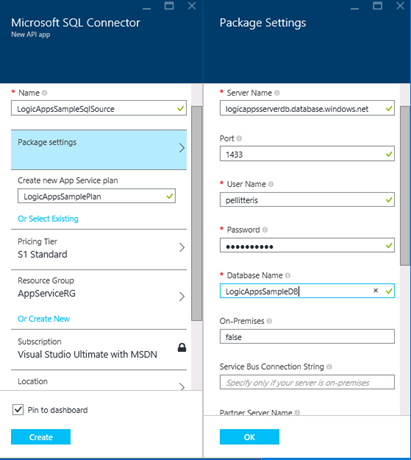
Scrolling down you have to specify the most important things: The Available Statement and the Polling Statement. The first one is the statement that checks for new information on the database. The second one, gets the information and make them available for the process.
Create the Artifact
In this demonstration, we will transform the information coming from the SQL database to a different information scheme. To do this we will need a map.
You can define a map using Visual Studio and Microsoft Azure BizTalk Services SDK available at http://www.microsoft.com/en-us/download/details.aspx?id=39087.
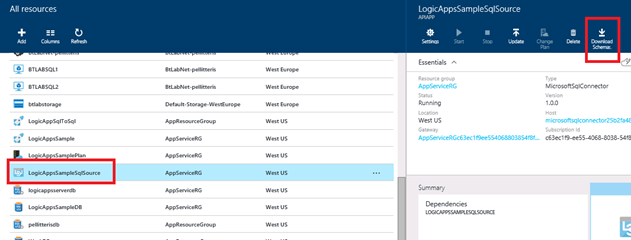
First, we need to download the schema that will act as a source schema.
To do that, navigate the portal in the all resources list and select the connection to SQL Server previously created. Then select the Download Schema link.
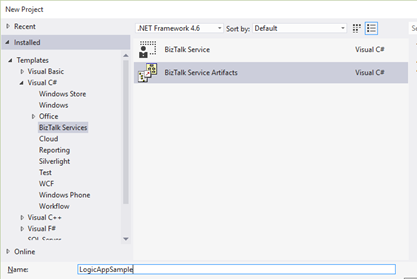
After installed Microsoft Azure BizTalk SDK, open Visual Studio and create a new project of type BizTalk Service Artifact.
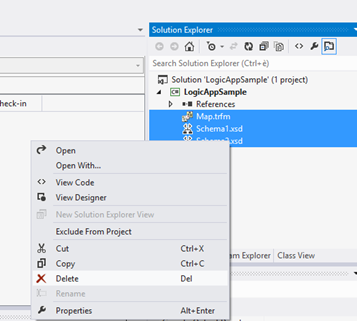
Delete al unneeded objects created by the project template.
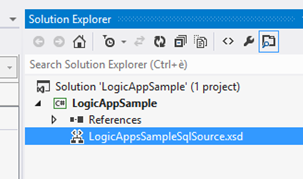
Then import the schema downloaded in the previous step.
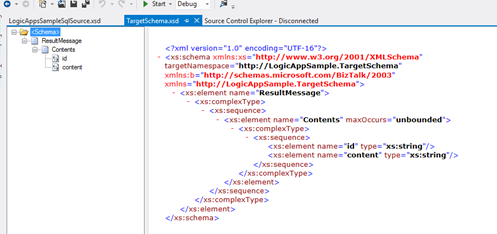
Now, create a new schema that will acts as the target schema. Following just a simple schema.
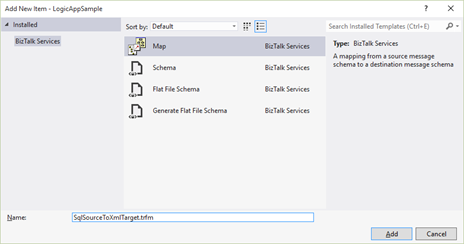
Finally you can create a new map to transform the source schema.
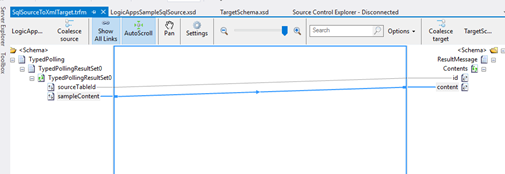
Define the mapping rules.
Close and save the project.
Now we will define a transformation service on Azure that will contains the map.
From the Azure Marketplace find for BizTalk Transform Service.
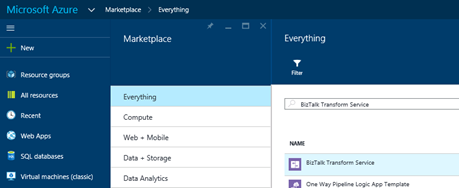
Select and specify a name, an App Service Plan (this must be the same used by the SQL Connector) and click on Create.
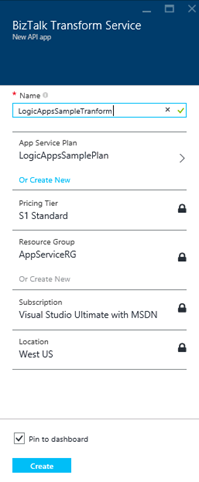
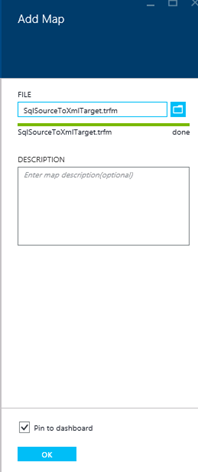
Navigate the Transform Service and select Maps.
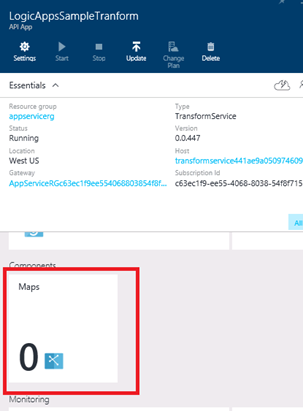
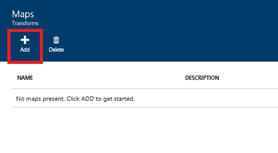
In the right panel will compare a new form with a list of maps. Clock on Add.
Select the “trfm” file created by Visual Studio Solution.
Create the Logic App
Now you are ready to create the Logic App.
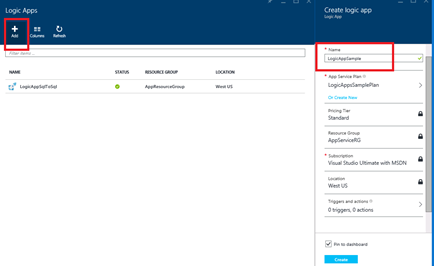
Navigate the Azure Portal, select Logic Apps and click on Add.
Specify Logic App name, the resources group and click on create.
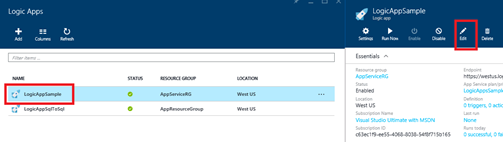
Once the Logic App is created click on Edit.
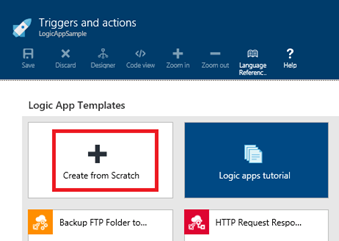
There are many Logic App templates. In this demonstration I choose a blank Logic App selecting “Create from Scratch”.
On the right panel select the “Microsoft SQL Connector” created previously.
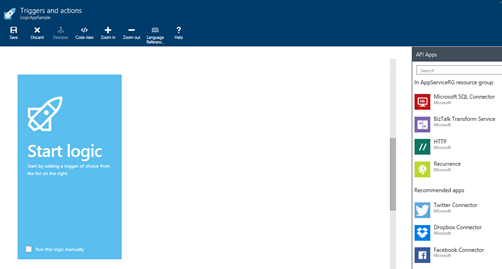
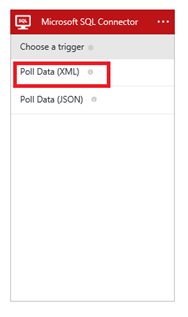
Specify “Poll Data (XML)”.
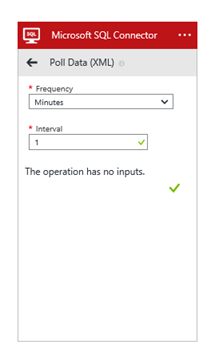
Specify the polling interval. Depending on the Pricing Tier you can specify different measures as polling interval.
Confirm your selection and select “BizTalk Transform Service”.
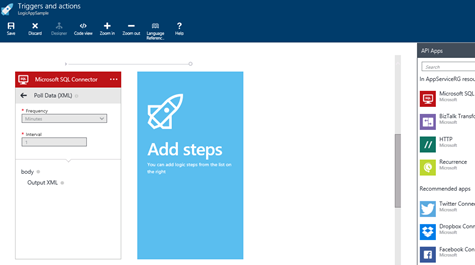
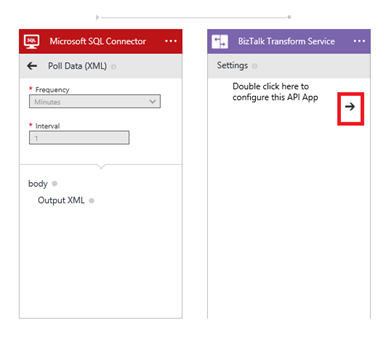
Click on Arrow to start the configuration.
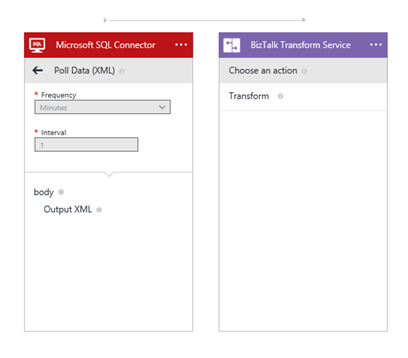
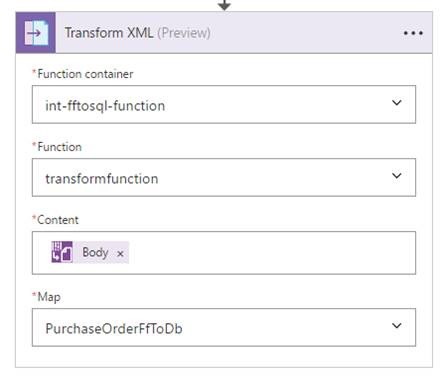
Then click on Tranform.
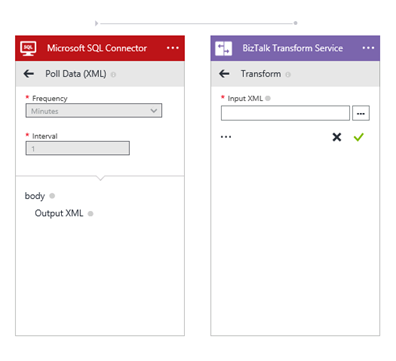
Choose the output of Microsoft SQL Connector as map input transform.
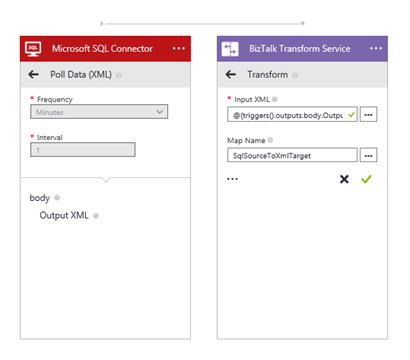
Then specify (manually) the map name.
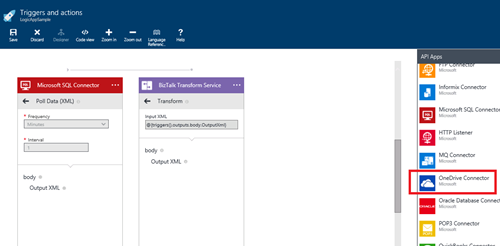
Finally select the OneDrive connector.
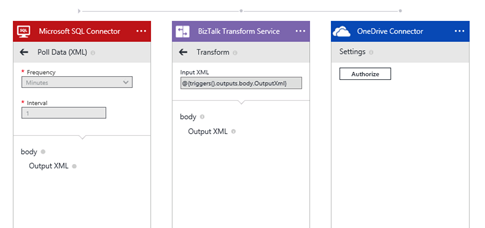
You have to autorize the access to your OneDrive subscription.
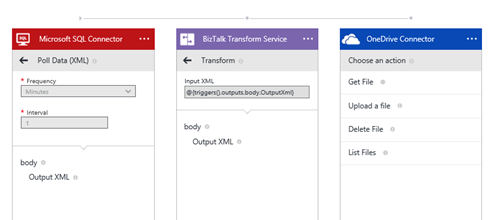
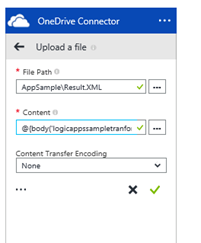
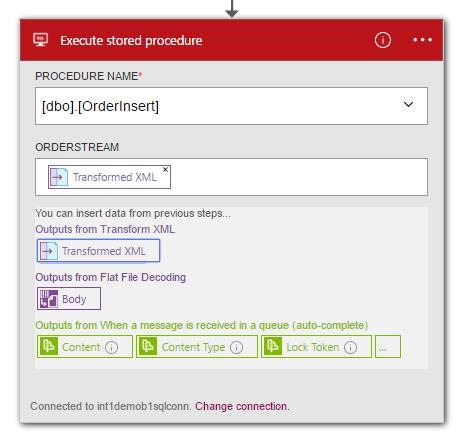
Then I chosen “Upload a file”.
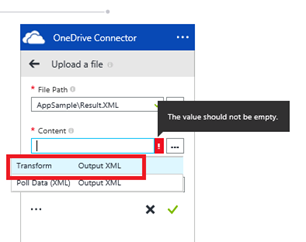
Specify a File Path and the Transform output as file content.
In this case no content transfer encoding is needed so specify “none”.
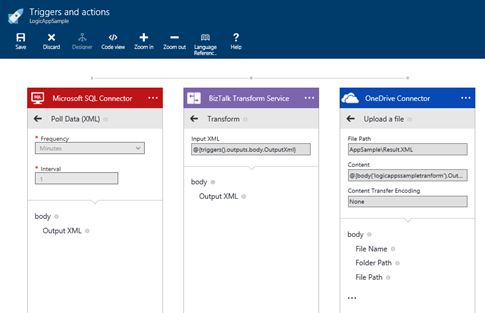
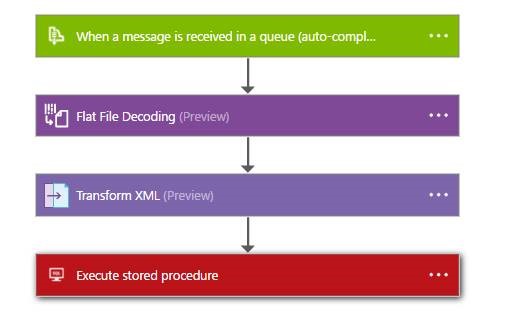
Once the configuration is completed, you should see the following integration flow.
Test the sample
To test the sample is enough to insert a row into SQL database table. You can use the following statement to do that.
insert
into SourceTable
(
sourceTableId,
transactionStatus,
sampleContent
)
values
(
1,
‘To Process’,
‘Content to transfer’
);
|
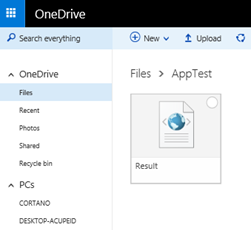
After a few seconds, you should see the file into your OneDrive subscription.
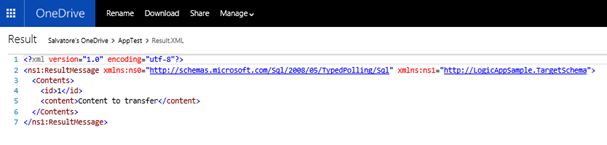
In the following picture, you can see the content of the result file.


![clip_image002[4]](https://pellitteris.net/wp-content/uploads/2016/11/clip_image0024.jpg "clip_image002[4]")
![clip_image004[4]](https://pellitteris.net/wp-content/uploads/2016/11/clip_image0044.jpg "clip_image004[4]")
![clip_image006[4]](https://pellitteris.net/wp-content/uploads/2016/11/clip_image0064.jpg "clip_image006[4]")
![clip_image008[4]](https://pellitteris.net/wp-content/uploads/2016/11/clip_image0084.jpg "clip_image008[4]")
![clip_image010[4]](https://pellitteris.net/wp-content/uploads/2016/11/clip_image0104.jpg "clip_image010[4]")
![clip_image012[4]](https://pellitteris.net/wp-content/uploads/2016/11/clip_image0124.jpg "clip_image012[4]")
![clip_image014[4]](https://pellitteris.net/wp-content/uploads/2016/11/clip_image0144.jpg "clip_image014[4]")
![clip_image002[6]](https://pellitteris.net/wp-content/uploads/2016/11/clip_image0026.jpg "clip_image002[6]")
![clip_image002[8]](https://pellitteris.net/wp-content/uploads/2016/11/clip_image0028.jpg "clip_image002[8]")
![clip_image004[6]](https://pellitteris.net/wp-content/uploads/2016/11/clip_image0046.jpg "clip_image004[6]")
![clip_image002[10]](https://pellitteris.net/wp-content/uploads/2016/11/clip_image00210.jpg "clip_image002[10]")
![clip_image004[8]](https://pellitteris.net/wp-content/uploads/2016/11/clip_image0048.jpg "clip_image004[8]")
![clip_image006[6]](https://pellitteris.net/wp-content/uploads/2016/11/clip_image0066.jpg "clip_image006[6]")
![clip_image008[6]](https://pellitteris.net/wp-content/uploads/2016/11/clip_image0086.jpg "clip_image008[6]")
![clip_image010[6]](https://pellitteris.net/wp-content/uploads/2016/11/clip_image0106.jpg "clip_image010[6]")
![clip_image012[6]](https://pellitteris.net/wp-content/uploads/2016/11/clip_image0126.jpg "clip_image012[6]")
![clip_image014[6]](https://pellitteris.net/wp-content/uploads/2016/11/clip_image0146.jpg "clip_image014[6]")

 Salvatore Pellitteri's Integration Blog
